dragan-s
on 30 August 2019
TurtleBot3 was released in 2017 and is positioned as a low-cost, open-source robot kit. For new owners of the TurtleBot3, there are various resources online that will assist you with building your brand new TurtleBot3 out of the box. One such example is the official TurtleBot3 instructional video. While it is a great video to help you with the assembly, there are a few points on practicality that you can take into account. Those few points are the subject of this blog post.
Better Raspberry Pi location placement for accessibility
The most optimal location for the Raspberry Pi board would be aft-left of the robot. That way you will have easy access to USB ports from the back, HDMI port from the left and SD card from the left-mid section.
But unfortunately the USB cable that comes with the robot is left angled, and the MicroUSB side is right-angled. Those circumstances will prevent you from placing the board aft-left, so I recommend settling on the next-best option, aft-right.

Once the TurtleBot3 is assembled, having placed the Raspberry Pi board aft-right, it will allow you to access the USB ports from the back.
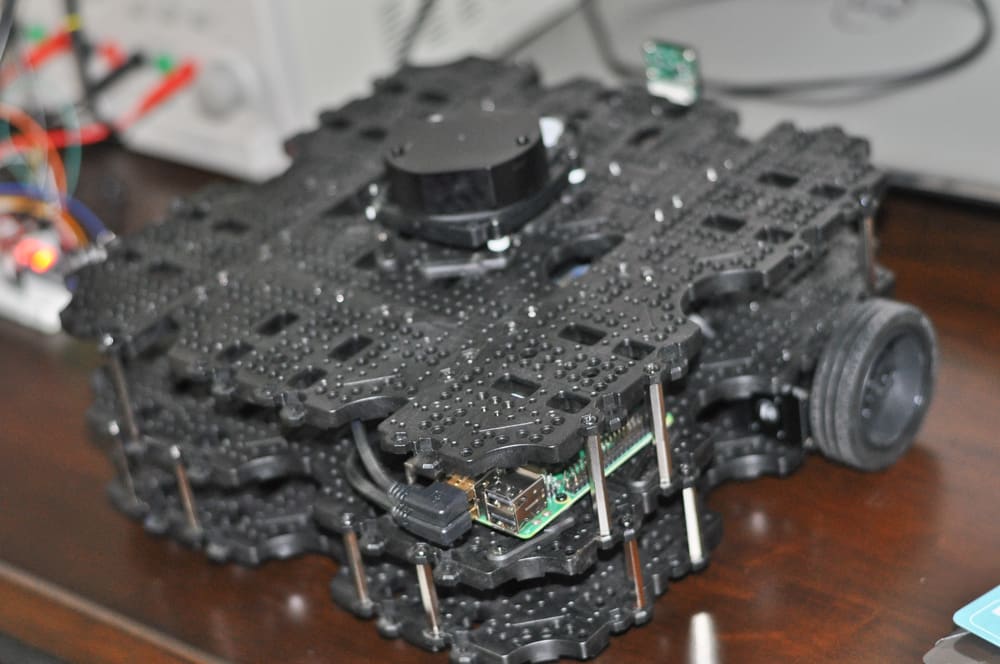
You’ll also be able to access the SD card for fast switching of the operating system through the mid-right side. You can pinch the SD card between the index finger and thumb and can pop it out of its slot quickly. If you can’t reach with your fingers, then you can use a pair of needle-nose pliers.
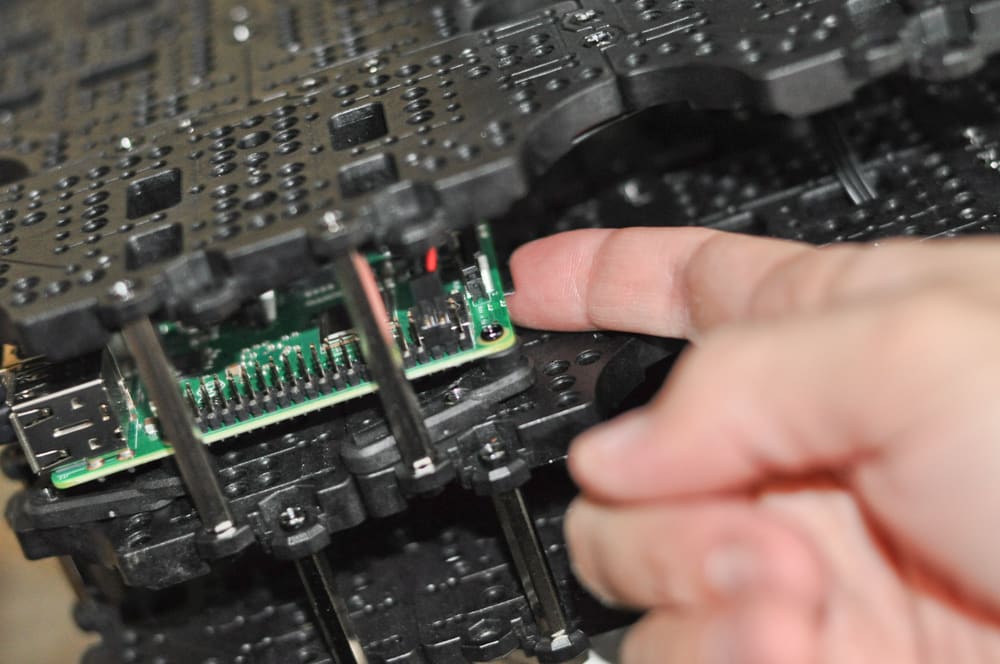
I do have a word of caution on the needle-nose pliers use. The level of feel and ability with the pliers is much reduced compared to your fingers. Squeeze and pull gently only when the pliers’ jaws are fully parallel to the SD card, or you might break it and end up with two SD cards.
With aft-right placement, the HDMI port is, unfortunately, facing the interior of the robot, but there is a silver lining. The HDMI cable is usually very thick and inflexible, and therefore, you can slide the cable in from the left side of the TurtleBot3 like a stick. You should be able to plug it into the Raspberry Pi board without too much trouble.
I should also mention that if you intend to use the Raspberry Pi camera, make sure to use the long camera cable to reach the board in the back.
LIDAR USB board placement for better access
The best location for the LIDAR rotating scanner is on the top platform for a 360-degree unobstructed view, but the USB output connects to the Raspberry Pi USB port. That creates a challenge when removing the top platform from the TurtleBot3. To alleviate that problem, I recommend placing the LIDAR circuit board one level below the scanner and close to a tile hole.

That way, when you need to separate the top platform from the bottom, the platforms are easily detachable. You can slide your left index finger from the top and your right index finger from the side and unclip the LIDAR data/power line header from the circuit board. Thus electrically and physically separating the top and the middle layer.

Development environment repeatability
While this is not necessarily related to assembly instructions, it is something that can make your life easier when working with TurtleBot3. If you are experimenting a lot with various ROS components, monitoring logs, etc., you find yourself needing a lot of terminals. Wouldn’t it be nice to automate some of this work? Maybe a single command that could start all the necessary terminals and ROS components?
Luckily, a utility called tmuxinator fits the bill nicely – a single command ‘tmuxinator start ros’ builds up a terminal with various open consoles. Tmuxinator is a kind of scripting wrapper for the Linux utility called tmux, and you will need to install both with ‘sudo apt install tmuxinator tmux’.
In the example below, you’ll use tmuxinator to create two windows. First one is called ros_local. In this window, you start ROS components that are local to your development laptop. Panes 1, 2 & 3 respectively launch roscore, turtlebot3_remote.launch & rviz
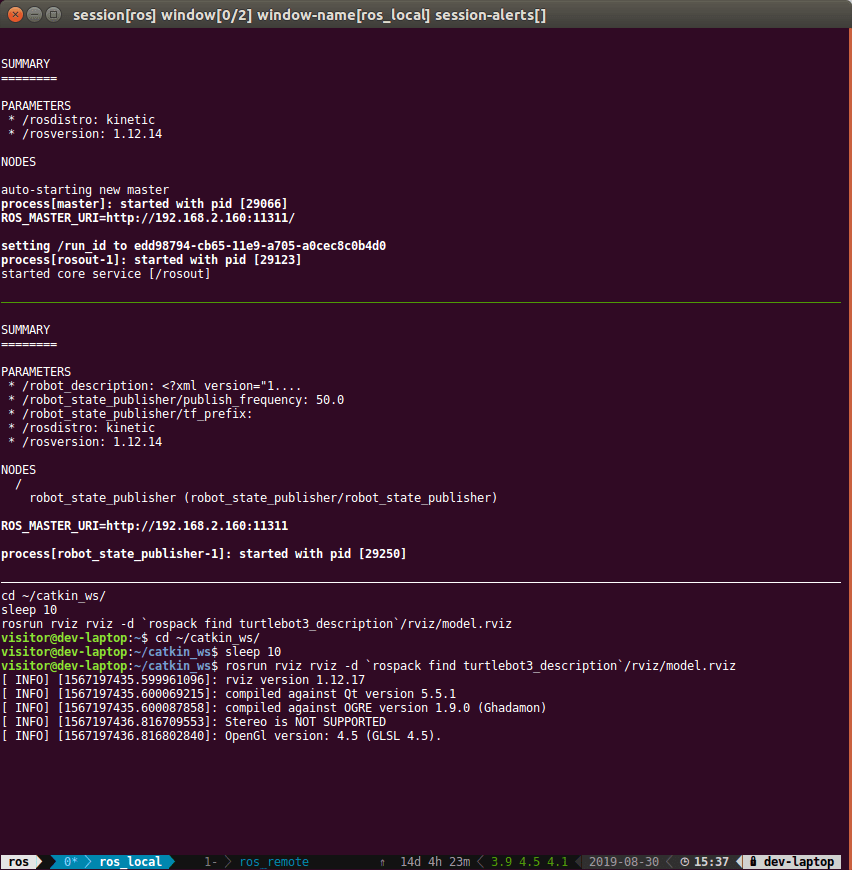
You’ll use the second window called ros_remote to log-on to the TurtleBot3 through ssh and start turtlebot3_robot.launch and turtlebot3_rpicamera.launch. The profile also creates an extra ssh session where you can type in random commands. Since tmuxinator creates a regular tmux session all tmux key bindings apply, you can create additional windows or panes. Run ‘man tmux’ to see all key bindings tmux supports and how to customise it further.
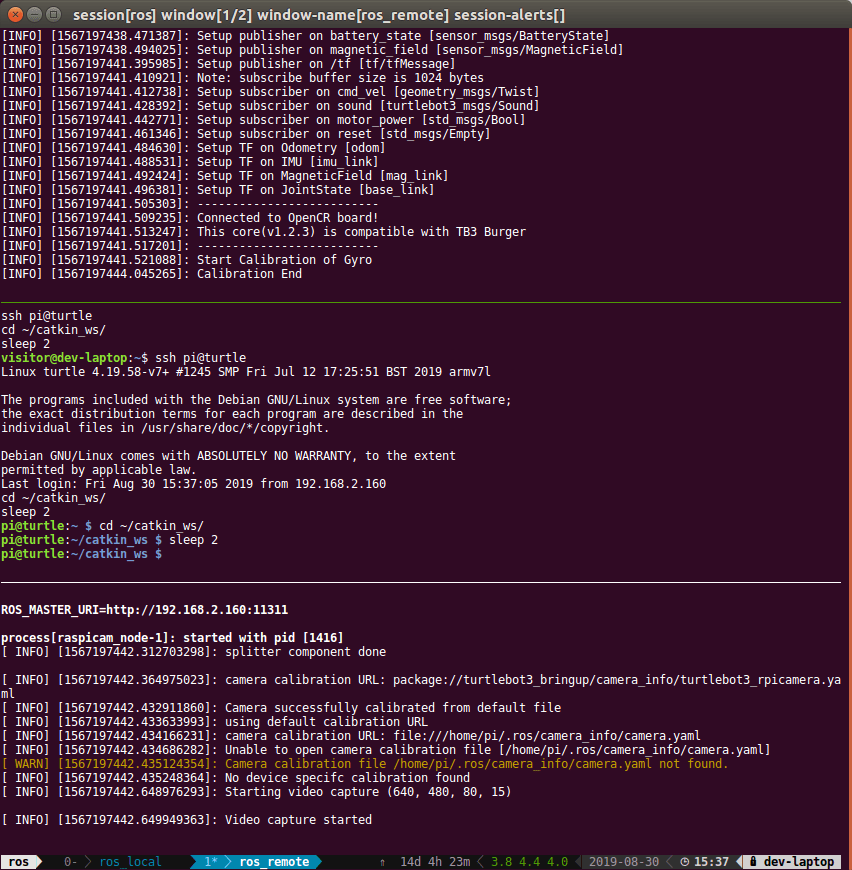
Running ‘tmuxinator start ros’ starts a profile called ‘ros’ that we have to create. To do that run, ‘tmuxinator new ros’. This command creates a YAML file with tmuxinator defaults.
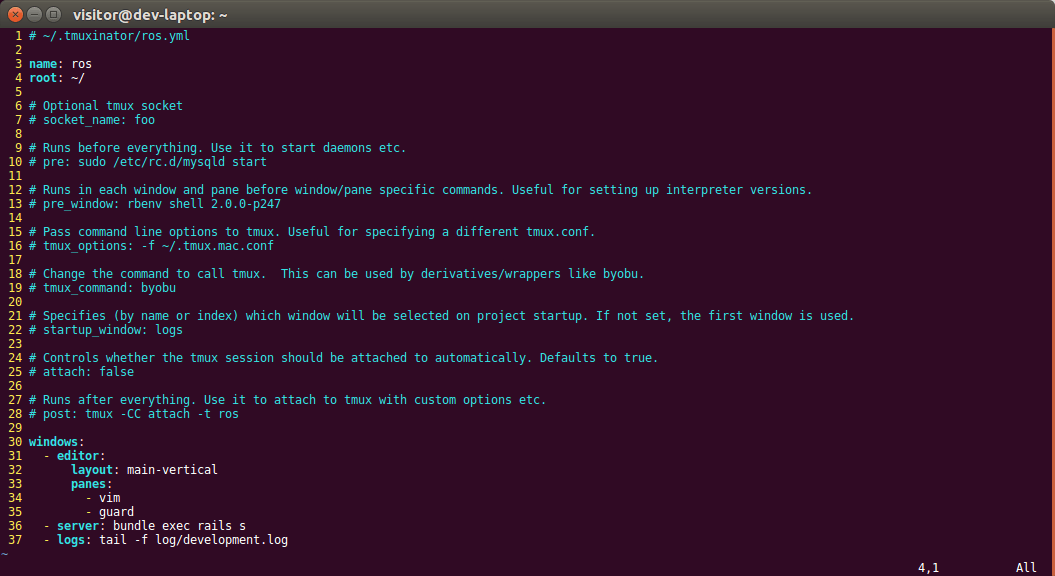
We can delete everything past line 5 and add our custom windows and panes definition. Since this is in YAML format, make sure to pay special attention to your whitespaces. If you make a whitespace mistake, tmuxinator can’t parse it, and it won’t start your new profile.
Take a look at the ros.yaml contents below; it creates two windows, ros_local and ros_remote. Then assigns a pane layout, where new panes should go, and create three panes under each window.
And finally, below the pane names (roscore, remote_state, rviz) are bash commands that tmuxinator will run on startup for you. For example, under the ros_remote window, it uses ssh as the first command to log into TurtleBot3 and execute the rest of the commands on the bot.
# ~/.tmuxinator/ros.yml
name: ros
root: ~/
windows:
  - ros_local:
      layout: even-vertical
      panes:
        - roscore:
          - cd ~/catkin_ws/
          - roscore
        - remote_state:
          - cd ~/catkin_ws/
          - sleep 2
          - roslaunch turtlebot3_bringup turtlebot3_remote.launch
        - rviz:
          - cd ~/catkin_ws/
          - sleep 10
          - rosrun rviz rviz -d `rospack find turtlebot3_description`/rviz/model.rviz
  - ros_remote:
      layout: even-vertical
      panes:
        - robot:
          - ssh pi@turtle
          - cd ~/catkin_ws/
          - sleep 2
          - roslaunch turtlebot3_bringup turtlebot3_robot.launch
        - lidar:
          - ssh pi@turtle
          - cd ~/catkin_ws/
          - sleep 2
        - rpicam:
          - ssh pi@turtle
          - cd ~/catkin_ws/
          - sleep 7
          - roslaunch turtlebot3_bringup turtlebot3_rpicamera.launch
Since this is a tmux session, you can use it like any other tmux session, where you can disconnect from it and connect to it later. Or you can destroy the session and have tmux terminate all the programs it ran. Getting everything back is as easy as running ‘tmuxinator start ros’ and for more information on how to use tmux, see tmux man page.
Conclusion
The interlocking jigsaw puzzle-like tiles of TurtleBot3 allow for extensive customisation. You don’t necessarily even need to follow any instructions; you are free to make it your own. Let me know what your experience is with TurtleBot3 assembly. I am particularly interested in what kind of customisations or ‘gotchas’ you have come up with for your projects.

